Written by Mihail Vladimirov.
Neither manager sprung any major surprises in terms of selection or formations. With Baker injured and Clark needing stitches following his head injury in the Chelsea game, Lambert had to start with Okore as Vlaar’s partner at the heart of the defence. One surprise could be that El Ahmadi was benched (following his efficient displays in the previous two games) and Bacuna was handed a debut start. The away side were unchanged with Rodgers opting for the same XI, playing within the very same shape as against Stoke.
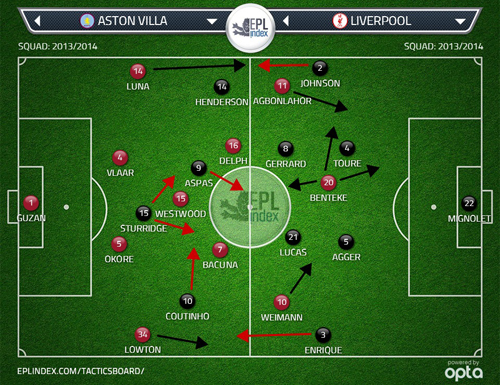
It was expected that Villa would start the game by sitting deep and trying to compress the space for Liverpool to play in their half, and then try to hit on the break. Essentially this was the same approach Lambert used in Villa’s two games up to now. There was the possibility that the home team would try to be more proactive from the start, given this was their first game this season at Villa Park, but this was – perhaps logically – cancelled by the growing fatigue levels the team might have felt following the enormous efforts against the two London clubs. That’s why it could be argued Lambert preferred to ‘save’ his team in the first half, approaching the game cautiously and taking it from there, depending on the match context and/or what Liverpool were to offer as a strategy.
Given their relatively basic and unadventurous approach but also because of how Liverpool were set up, Villa spent the majority of the first half under total tactical and technical dominance. Based on the ‘depth’ of the Reds’ tactical plan and the obvious attention to detail that the team displayed, in regard to how precisely a team should completely nullify and then threaten the opposition, it could be said Liverpool demonstrated a true Benitez-esque tactical master class. To fully appreciate the thinking behind the strategy and why it was so efficient, it is worth going through each facet of the tactical plan separately.
The rest of this post is for Subscribers only.
[ttt-subscribe-article]